Cozy Roasted Vegetable Penne with Plant-Based Sausage
It’s finally feeling like Fall here in the Lowcountry!! I made this recipe a few weeks ago with the last bit of cherry tomatoes and zucchini for the year. My eggplant is still (slowly) coming in. I’m hoping to continue harvesting for another month, although it has really slowed down. We’re still holding out hope as it’s FULL of those beautiful purple blooms and the bees are busy pollinating away!
This recipe is perfect for using up your late-summer harvest, while still having that cozy, fall feel. I added plant based sausage here but for those of you that eat meat feel free to use regular (although I highly recommend trying Impossible Sausage for Meatless Monday! It’s so good!).
Delicious roasted vegetables mixed with hearty chickpea pasta, sweet marinated tomatoes, savory “sausage,” topped with fresh basil and parmesan.. What’s not to like?? Let’s dive in!
Start by preparing your pasta according to the package. I use Bonza pasta, as I find it to have the best texture out of all the other chickpea pastas out there. Plus, it cooks so quickly that is makes for the perfect weeknight dinner!
Now you’re going to want to preheat your oven to 425°F and prepare a baking sheet with parchment paper.
Place your chopped zucchini, eggplant, and broccoli on your prepared baking sheet and coat with olive oil, garlic powder, salt and pepper. Roast for 35 minutes.
While your vegetables roast in the oven, you’ll need to marinate your cherry tomatoes. Try to find an aged balsamic for this recipe. They’re a bit sweeter without the added sugar of a “glaze.” If you can’t find aged, simply simmer your balsamic on low, stirring constantly, until it thickens slightly. Voilà! Homemade Balsamic Glaze!
Combine your balsamic, local honey (great for allergies!), and tomatoes into a small bowl. Marinate while your vegetables are finishing up.
Next it’s time to cook your “sausage!” Heat a large skillet on medium-high. Add your plant-based (or regular) sausage. Cook until golden brown throughout. I like to break it up with my spatula, then let it sit flat in the pan for a few minutes to build up a golden crust. Then I continue to crumble and flip with my spatula until it’s cooked through.
Now that everything is cooked, we need to combine all these delicious flavors together! Mix your prepared pasta, roasted veggies, sausage, and marinated tomatoes in a large bowl. Add an extra drizzle of olive oil, aged balsamic, salt and pepper and give it a good stir. Top with fresh basil and grated parmesan and get ready to dive in! I love to also add a bit of red pepper flakes to this. The combination of sweet, salty, with a little kick is just perfect!
This recipe is the perfect way to use up those end of the season veggies from the garden! I love how cozy this meal is as we transition into the Fall Season. It’s perfect for Meatless Mondays or a quick weeknight dinner, and even makes enough for meal prepping or bringing to a party!
I’ve been trying to “romanticize” our weeknights at home so we aren’t just always looking forward to Friday. So light those candles, pour yourself a glass of wine, and enjoy this perfectly fresh and cozy Roasted Vegetable Pasta Recipe!
Bon Appétit
Garden to Table Roasted Cherry Tomato Sauce
Cherry tomatoes are my #1 plant in my organic kitchen garden! Mostly because I get TONS of them at once, and also because there are so many things you can do with them! Today, I'm sharing an incredible homemade Roasted Cherry Tomato Sauce recipe. It’s loaded with garden fresh veggies and aromatic herbs. There are no added preservatives or chemicals, just vitamins and healthy fats!
Let’s start with my secret ingredient! Carrots!
Fresh picked from the garden, carrots reduce some of the acidity in tomato sauce by adding a subtle sweetness. While you won’t necessarily taste the carrots, it gives a little hint of flavor and also adds a thickness to your sauce.
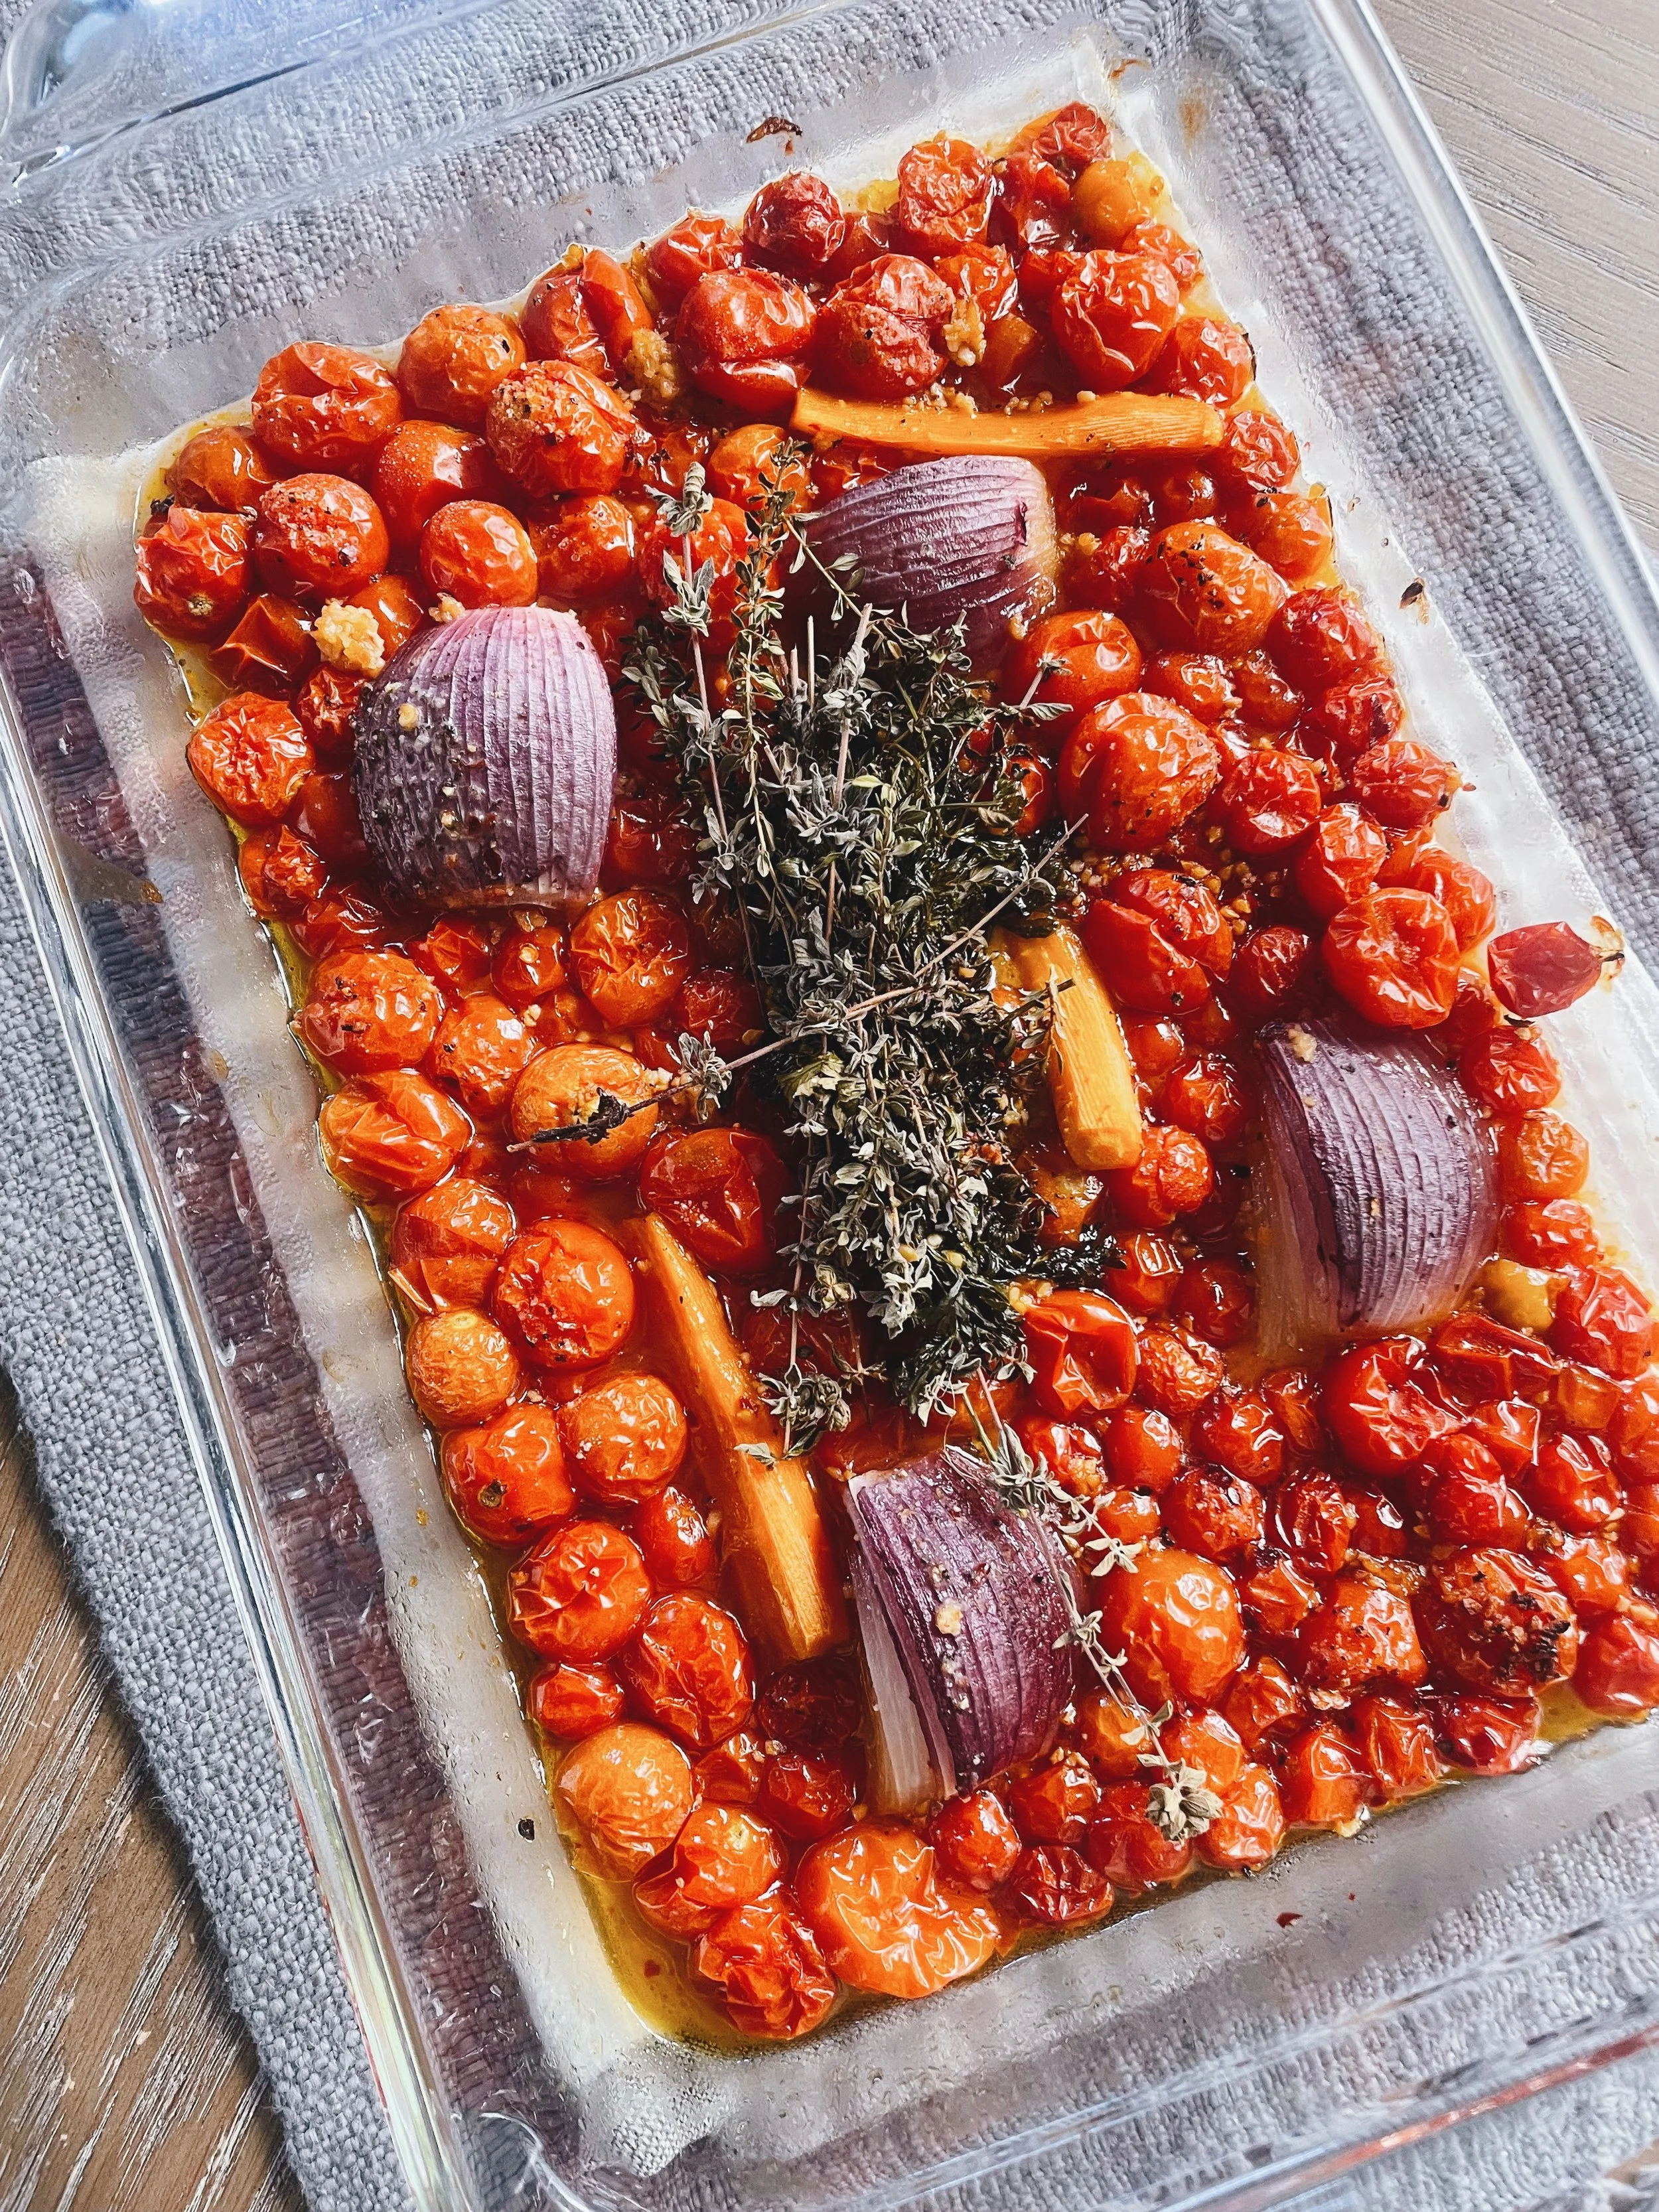
This recipe is so easy and delicious! You simply fill up a casserole dish with fresh picked tomatoes, onion, carrots, garlic, and a gorgeous herb bundle. Aren’t the colors so beautiful? Topped with a heavy drizzle of extra virgin olive oil and fresh ground salt and pepper, this all goes right into the oven on low for a couple of hours. The house will smell INCREDIBLE.
After roasting low and slow, you’ll remove the herb bundle, pour it all into a high speed blender or food processor, and that’s it! Get ready for the most delicious sauce that you can use on anything! After making it yesterday I told Nate that I could just eat it by itself with a spoon! So maybe I should rename this one Roasted Cherry Tomato Soup? You can decide!
Let me know if you try it out! Be sure to check out my Healthier Eggplant Parm Stacks, where I use this amazing sauce.
Leave a comment below!
Garden to Table “Healthier” Eggplant parm stacks
Garden to Table Eggplant Parm Stacks! Perfect for Sunday Supper or Healthy Meal Prep!
Summer is in full swing in the garden! The tomatoes, peppers, cucumbers, and (my personal favorite) eggplant are all growing beautifully! Last year I tried adding eggplant to my organic garden and was just amazed by how easy it was AND how much I got to harvest!
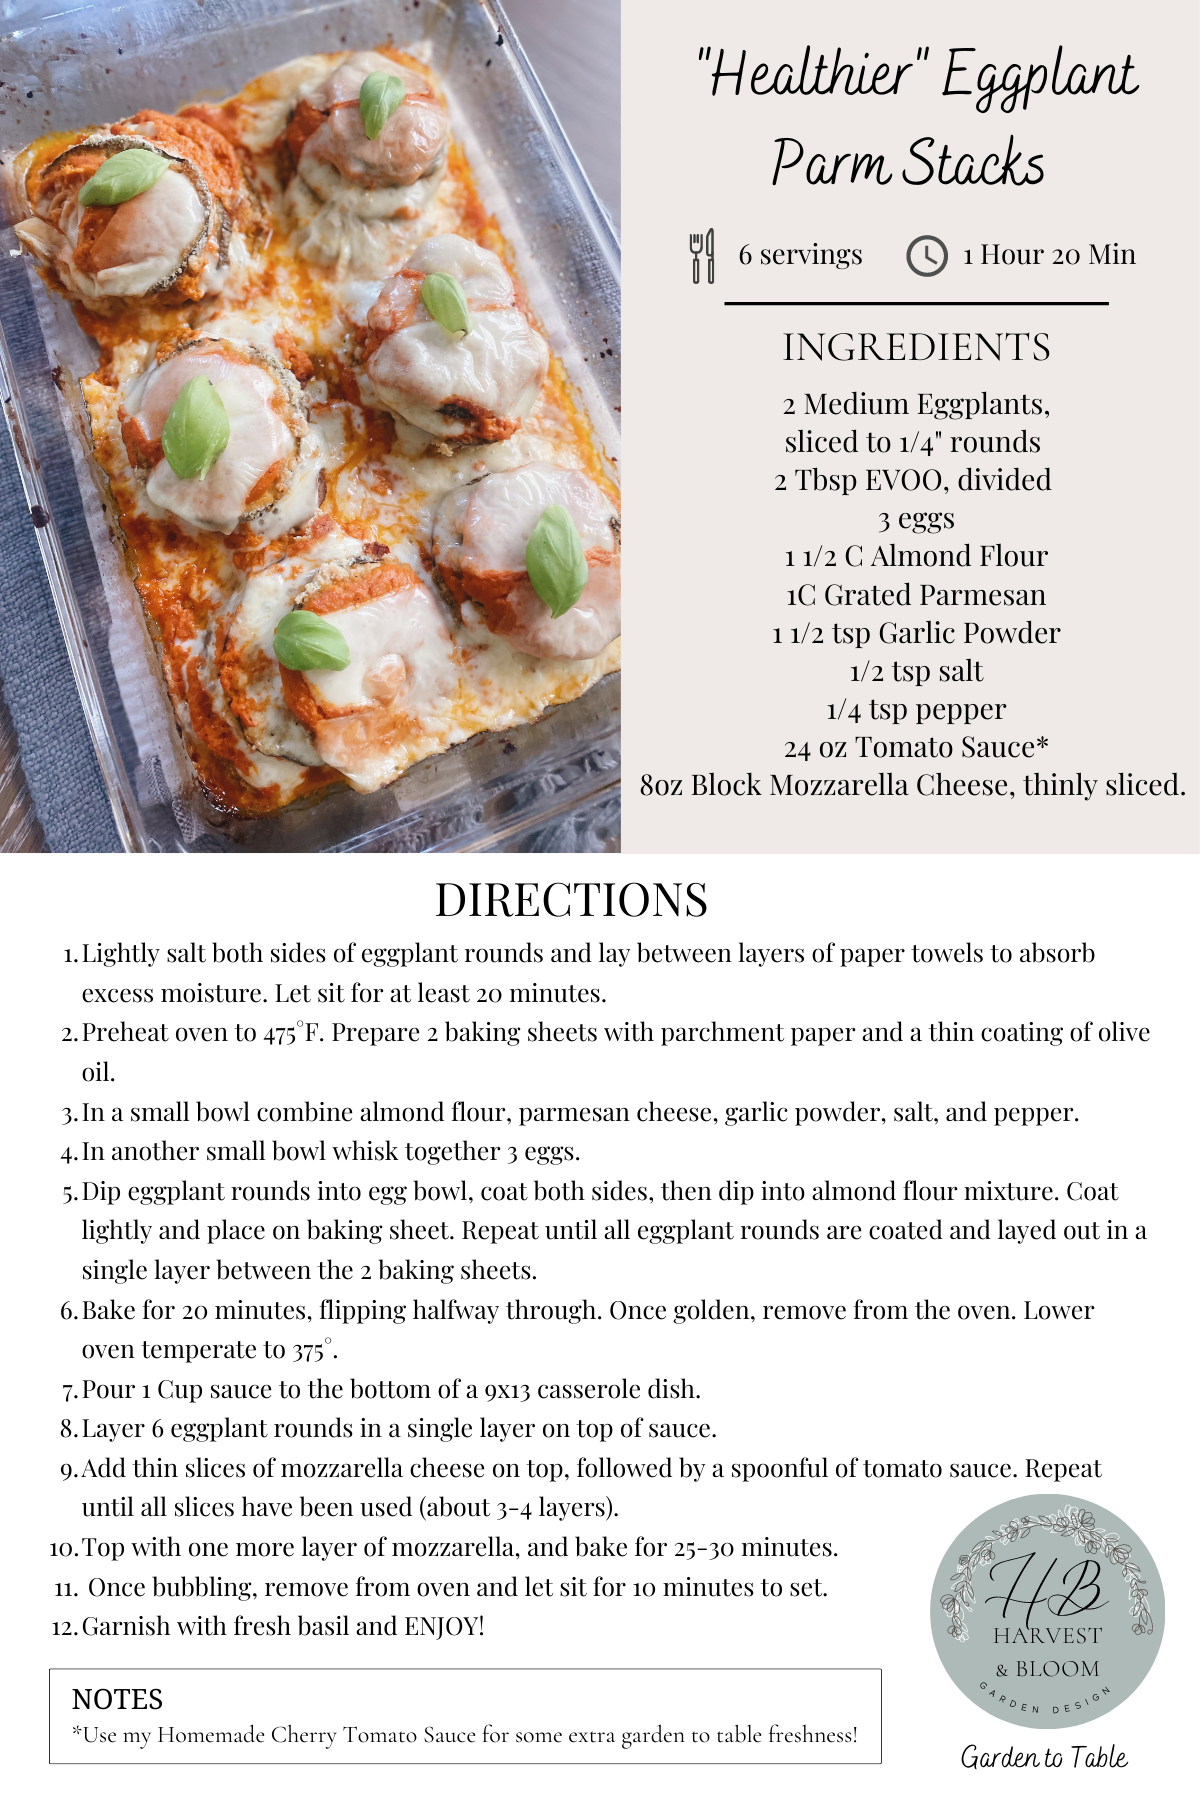
Now, as a “wanna-be” Italian, I love a good Eggplant Parmigiana! With so much eggplant growing each week I wanted to create a recipe that lightened it up a bit and could fit into my lifestyle, even when I’m trying to be health-ish. This recipe does just that! Here we’ve swapped out breadcrumbs for almond flour, and we’re baking the eggplant instead of frying! Plus if you really want to go full garden-to-table, I’ve mastered my homemade Roasted Cherry Tomato Sauce, and will be posting that so soon!
A warning before you start - this recipe does take a bit of time. It’s super easy, but each step takes about 20-30 minutes.
I find this recipe perfect for Sunday Supper, or even an awesome meal prep option! With 6 servings, you can easily divide this into 6 oven-safe containers and stack them right in the fridge until they’re ready to be eaten during the week.
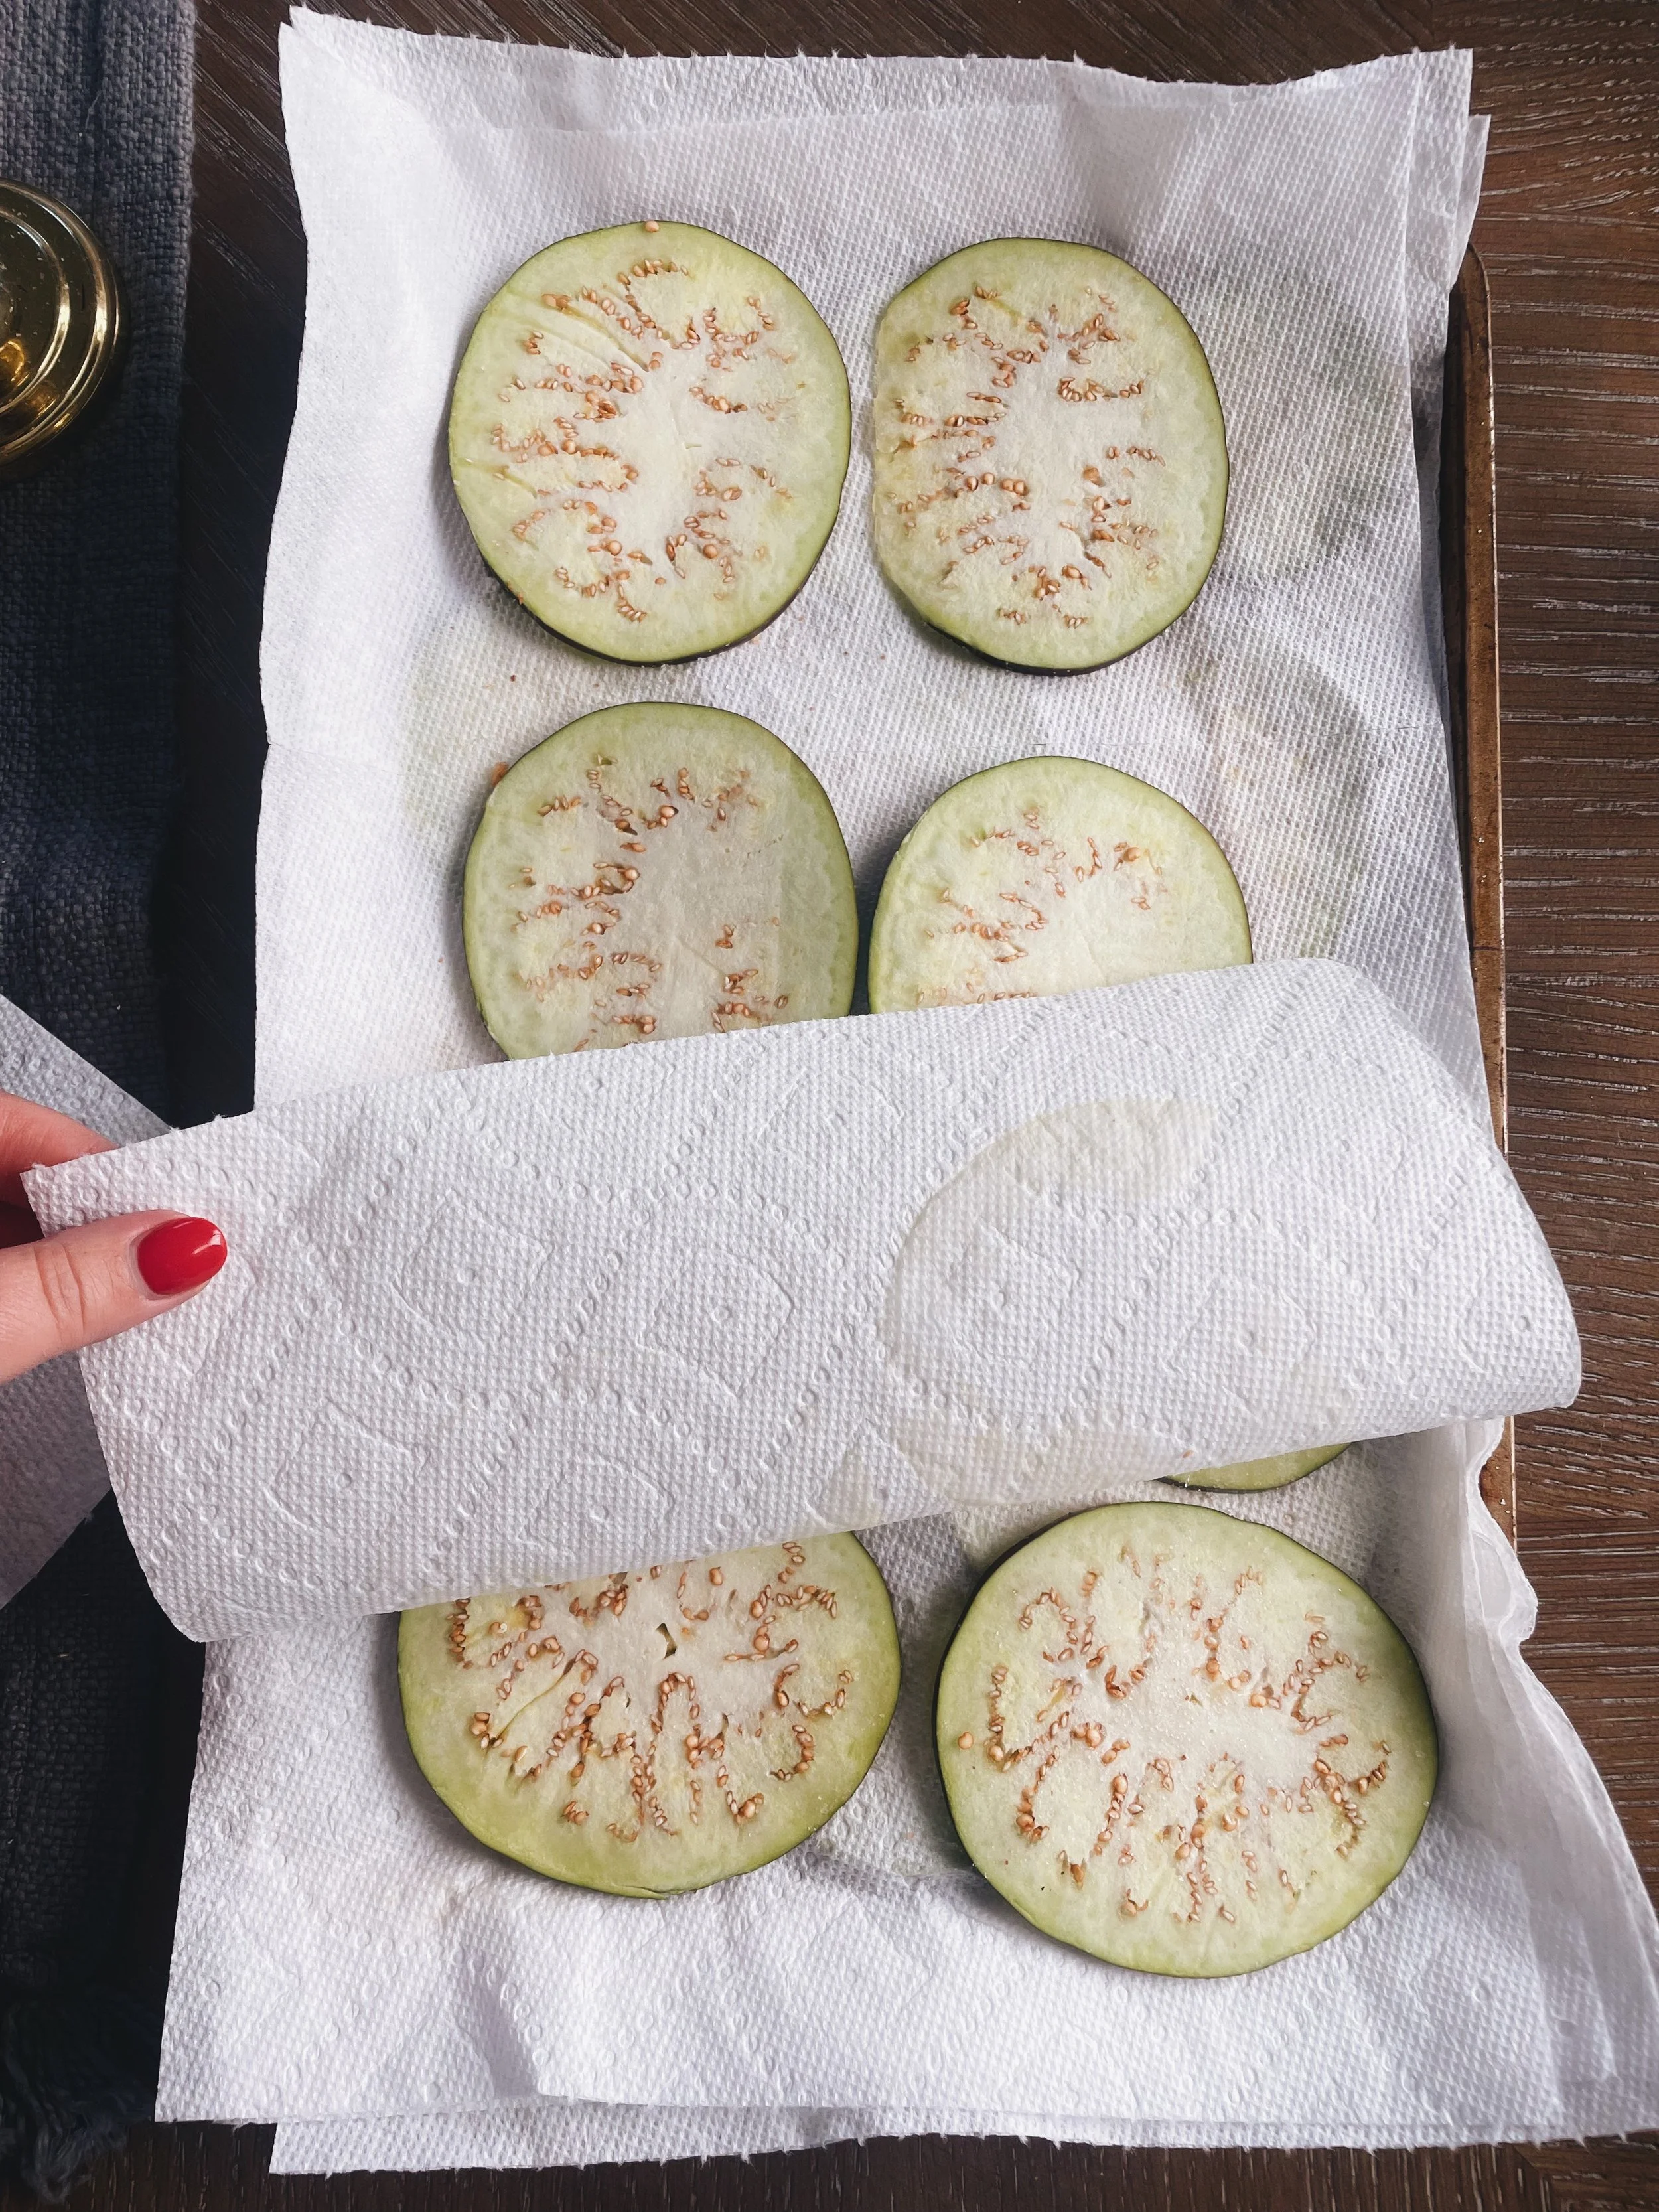
This first step is truly the most important! Don’t skip it!! You need to remove as much of the excess water from your eggplant as you can. Lucky for you, I have a super easy trick that takes minimal effort, but get’s the job done. Simply take a baking sheet, line it with a couple layers of paper towels, add a light dusting of sea salt on the towels, then add your eggplant round in a single layer on top. Add another light dusting of sea salt, cover with a layer of paper towels, and repeat! Do this until all of your eggplant is sandwiched between a salty paper towel (or clean tea towel).
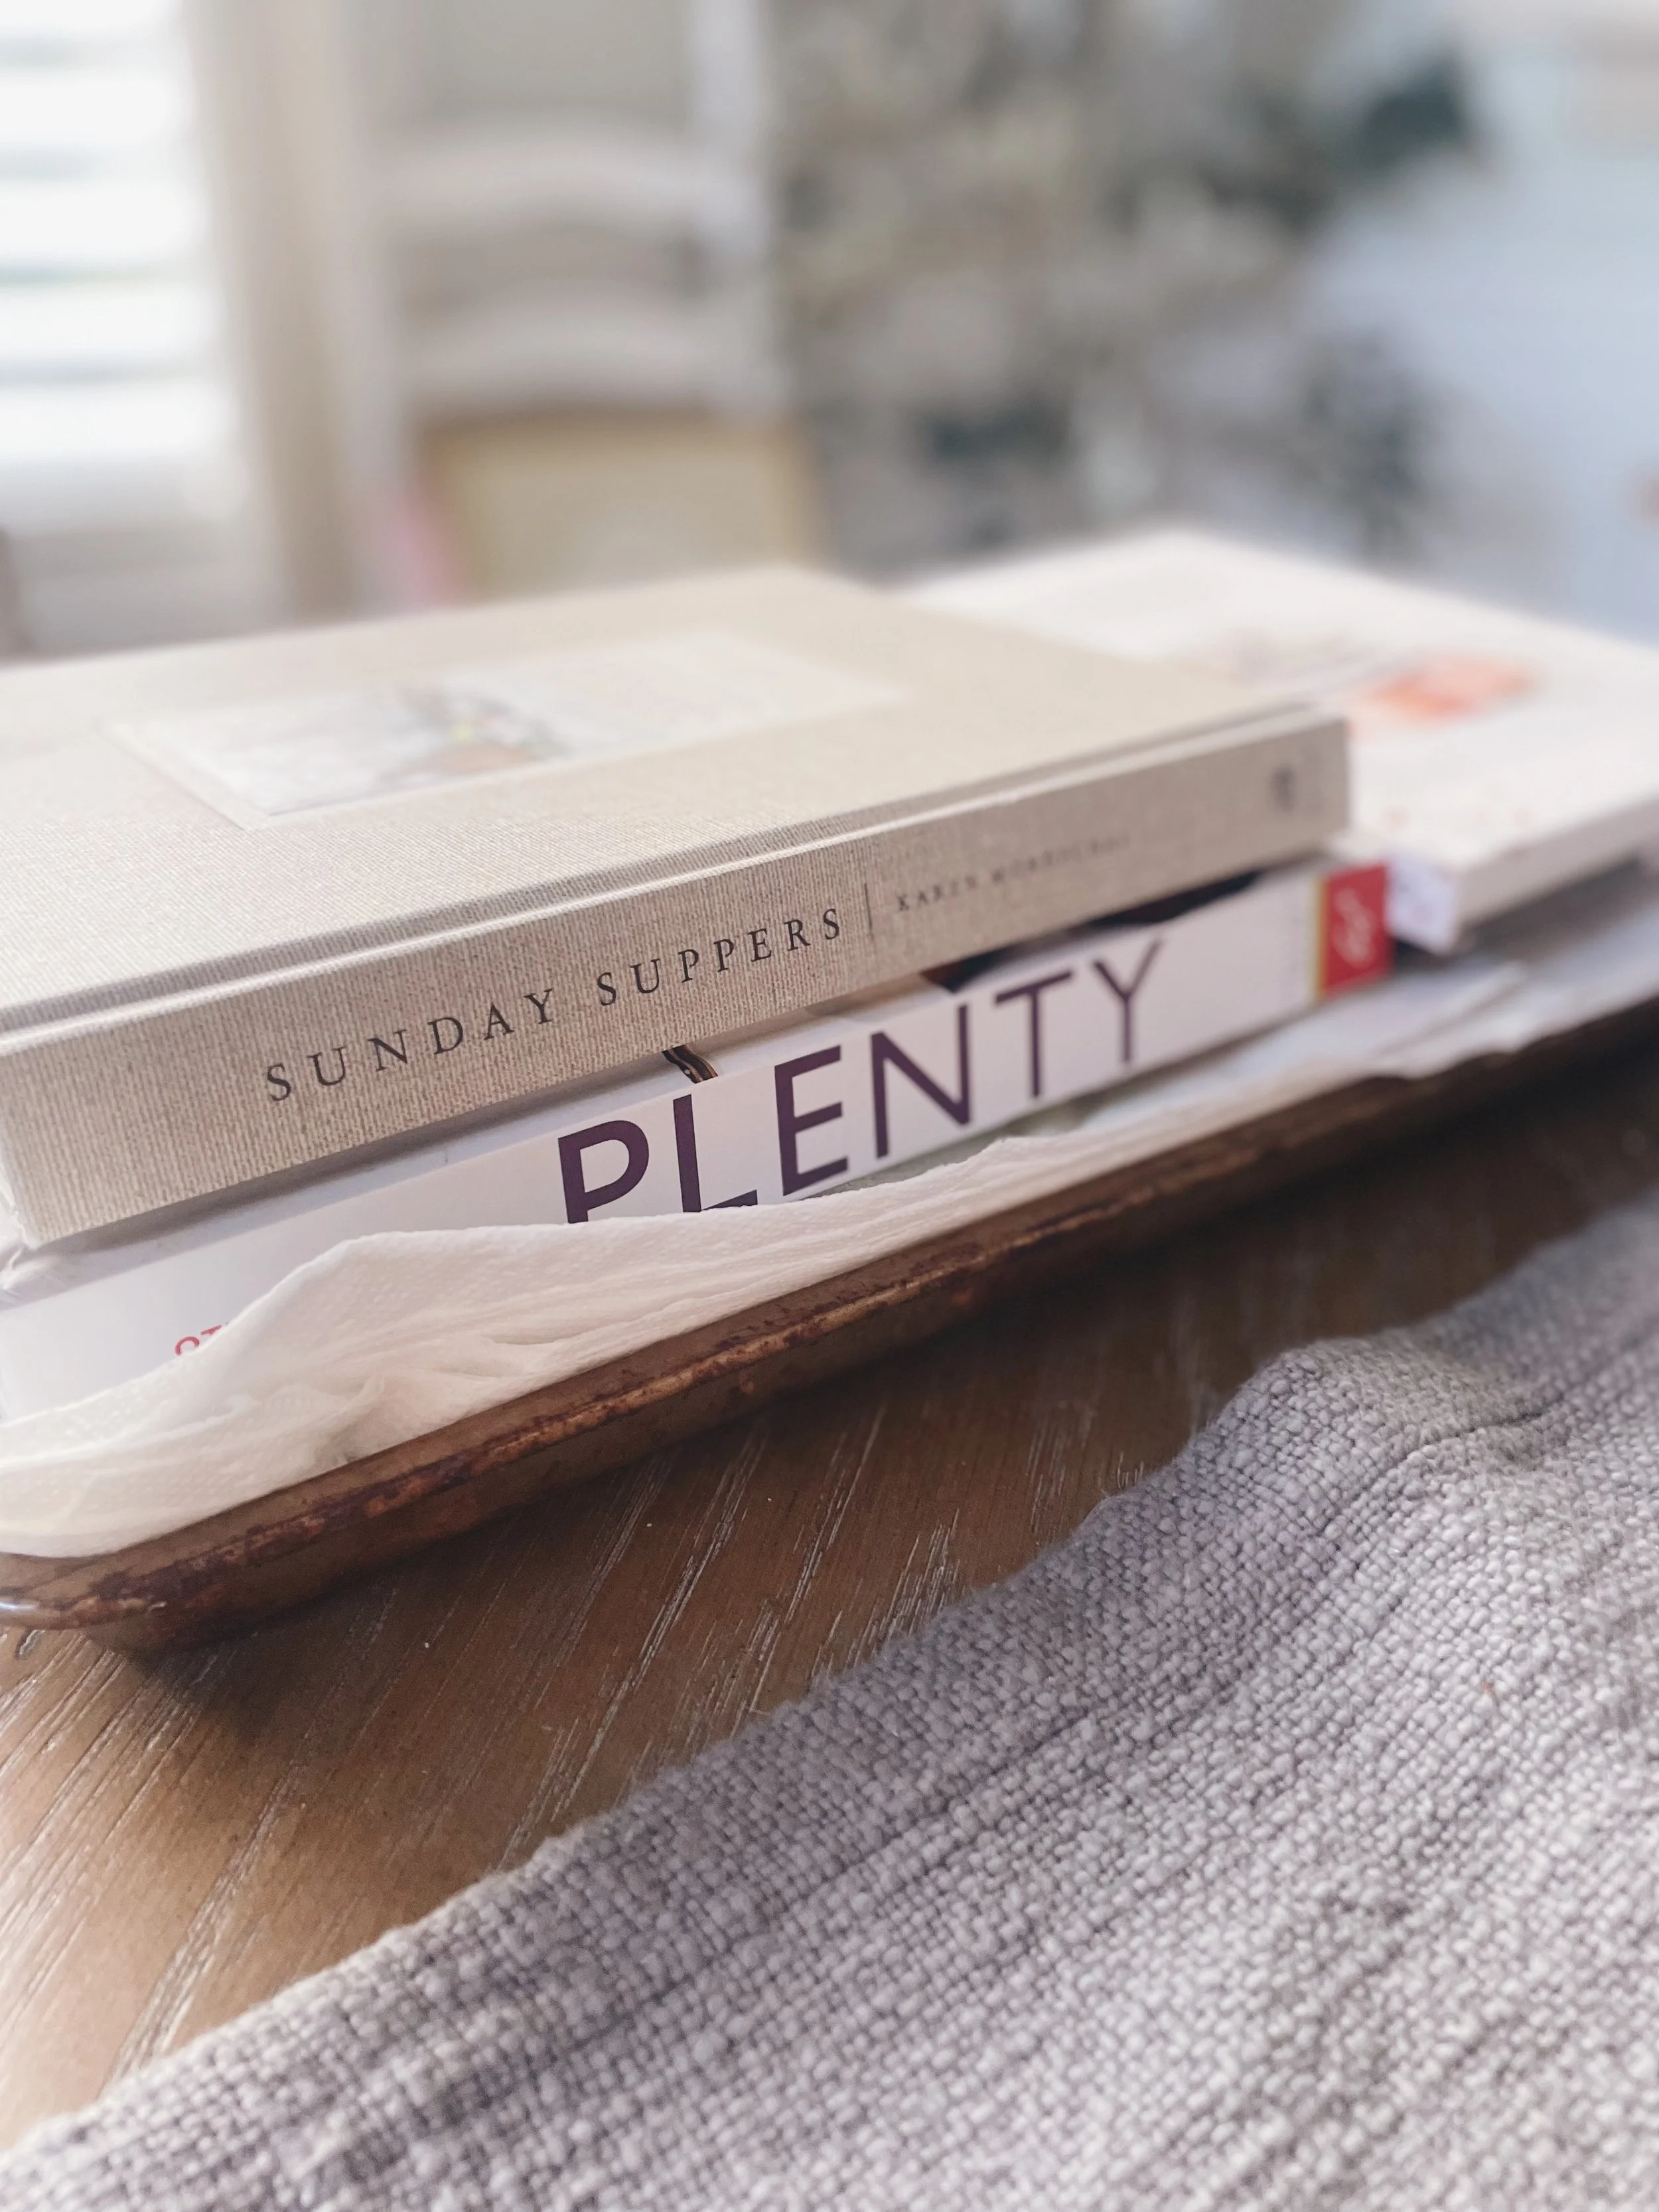
Now you’ll want to weigh them down a bit. I like to take some heavy cookbooks (some of my favorites shown here!) and layer them on top of the top-most paper towels.
Let this sit for at least 20 minutes, longer if you have time. This will help drain any excess water in the eggplant and make it even crispier without needing to fry them.
Once the eggplant is nice and dry you’ll coat in a light egg wash, and then a delicious (and health-ish) almond flour mixture). Of course I neglected to take a photo of this step… but trust me, it’s so easy! Once each eggplant round is coated you’ll place them in a single layer on a baking dish and bake for 20 minutes, flipping half way. No frying needed! These eggplant rounds turn out incredibly delicious each time! They’ve become a weekly staple in my house. Now here comes the fun part:
It’s time to layer all of your amazing, and mostly garden fresh, ingredients to a casserole dish! Here, I’m using my homemade Garden to Table Cherry Tomato Sauce. Start with a layer of sauce in the bottom of the dish, then layer in 6 rounds of eggplant on top of the sauce. Next, you’ll top with some sliced mozzarella (slice your own! Try not to buy the pre-shredded, as easy as it is! It most likely will contain cellulose, and we just don’t need that in our garden to table recipes). On top of the mozzarella, you’ll add a spoonful of your favorite sauce and repeat! With the eggplant that I use, I usually get about 3-4 layers of eggplant per stack. Top with 1 last layer of mozzarella and bake! So easy!
This bubbly goodness is so delicious you’ll never know it’s been lightened up! Ready to give it a try?? Full recipe below!
Let me know what you think!
How to Prune Vining Tomatoes
It’s that time of year! Time to prune your vining tomatoes, that is!
As the weather starts to heat up and summer is in full swing my tomato plants are taking off and well.. taking over! Cherry Tomatoes have been my favorite thing to plant in the garden simply because of their high yields, but they do take a bit of work to get the most out of your harvest.
As you can see here, the vines are well over 8ft tall and have reached up and over my tomato arch! Now, even though they are called “Vining Tomatoes” they don’t actually “vine" themselves. They need a little extra help! I like to prune heavily. It helps with healthy air flow, pushes the energy into creating fruit instead of leaves, and also helps you notice any critters as you clip away at your vines.
Now, where to begin?? How do you prune vining tomatoes? Here is what you’ll need! Grab your Fiskars and/or garden sheers, gardening gloves, and twine. I like to pre-cut 1ft pieces of twine before I get started so they are ready to go. Normally I don’t wear gloves when gardening, I like to just dive in, but that’s up to you!
Now here is where it gets a little controversial. You may have heard (like me) to remove the suckers, BUT I am going to teach you the opposite. This is what I have found the most success with. If you want MORE fruit, you remove the stems beside the suckers. If you want BIGGER fruit, you remove the suckers.
Since these are vining tomatoes in my garden, I don’t need them to be large - I just want higher yields so I prune the stems beside the suckers (see photo to the right). You can see the small sucker is growing out of the corner where the leaf stem and vine intersect. Leave the sucker (the one coming out at a 45 degree angle) and clip off the leaf stem close to the vine. Suckers actually grow to produce flowers, and then later, fruit! So by keeping them you’re sending more energy into growing more tomatoes.
If this was a slicing tomato I’d be trimming back the suckers to get larger fruit!
I also like to clip off any leaves closer to the bottom of the vines. This helps with better air flow and reduces risk of disease. I like to think that my tomato plants tell me which leaves to remove when it’s time to prune. Any brown, yellow, or diseased leaves should be clipped! As the vines grow taller, you’ll see some lower branches start to brown, especially if there is not a healthy air flow. This is a great sign to get pruning!
This is my garden before pruning! Woah! The right side had been pruned a few weeks prior, but was already overgrown. The left side hadn’t been touched yet - a jungle!
This cherry tomato plant needed some serious pruning and help reaching over the arch for support. Once I got everything untangled and clipped off all excess branches/leaves, I was able to get to the next step - Trellising!
There are many different ways to support your tomato vines. I personally love a beautiful garden arch. It not only adds a ton of space for vertical growing and a strong support for even the heaviest vines, but it’s also is a stunning focal point in the Kitchen Garden! Since my business is all about teaching you how to grow your own organic food in a space that is both functional and beautiful, I love using arches and trellises to give height and structure in a garden.
After all of your vines are pruned and thinned, it’s time to tie them off on your arch/support. Take your pre-cut twine and tie off each vine loosely to the supports. Tie them off as high as they will go. Be sure not to tighten the twine too much, as the vines will thicken as they grow. You want to keep them as untangled as possible, and try to avoid overcrowding. This will help circulation and you’ll also be to clearly see all of your healthy fruit growing in!
Be careful when handling your vines! The worst feeling is knocking off a beautiful cluster of baby tomatoes, BUT it will most likely happen occasionally so don’t beat yourself up when it does! By pruning you’ll have hundreds more tomatoes growing in so soon!
And that’s it! I like to prune a little at a time every week/bi weekly. Don’t be like me in that overgrown photo! It was a scorching hot day in the Lowcountry and I waited way too long to get pruning! By doing a little each week, it’s much more manageable.
I hope this post helps you all with your tomato gardening! Happy Pruning!!
Growing Bare Root English Roses in Containers
Love English Roses but don’t have the space to grow beautiful rows of them? Not a problem! Tons of English Rose varieties are able to grow in pots and planters! There are few extra steps you need to take to ensure your blooms flourish, and this post will help you do just that!
Let’s start with pot and planters!
English Roses do need some extra space to grow and establish strong roots, so you’ll want to find a planter that is about 24” x 24” in size. I’ve grown shrub roses in round terracotta and plastic pots, and climbing roses in square cedar planters, the shape does not matter! You’ll want to make sure there is nice drainage (more on this later), and is placed in a spot with at least 4-6 hours of direct sunlight.
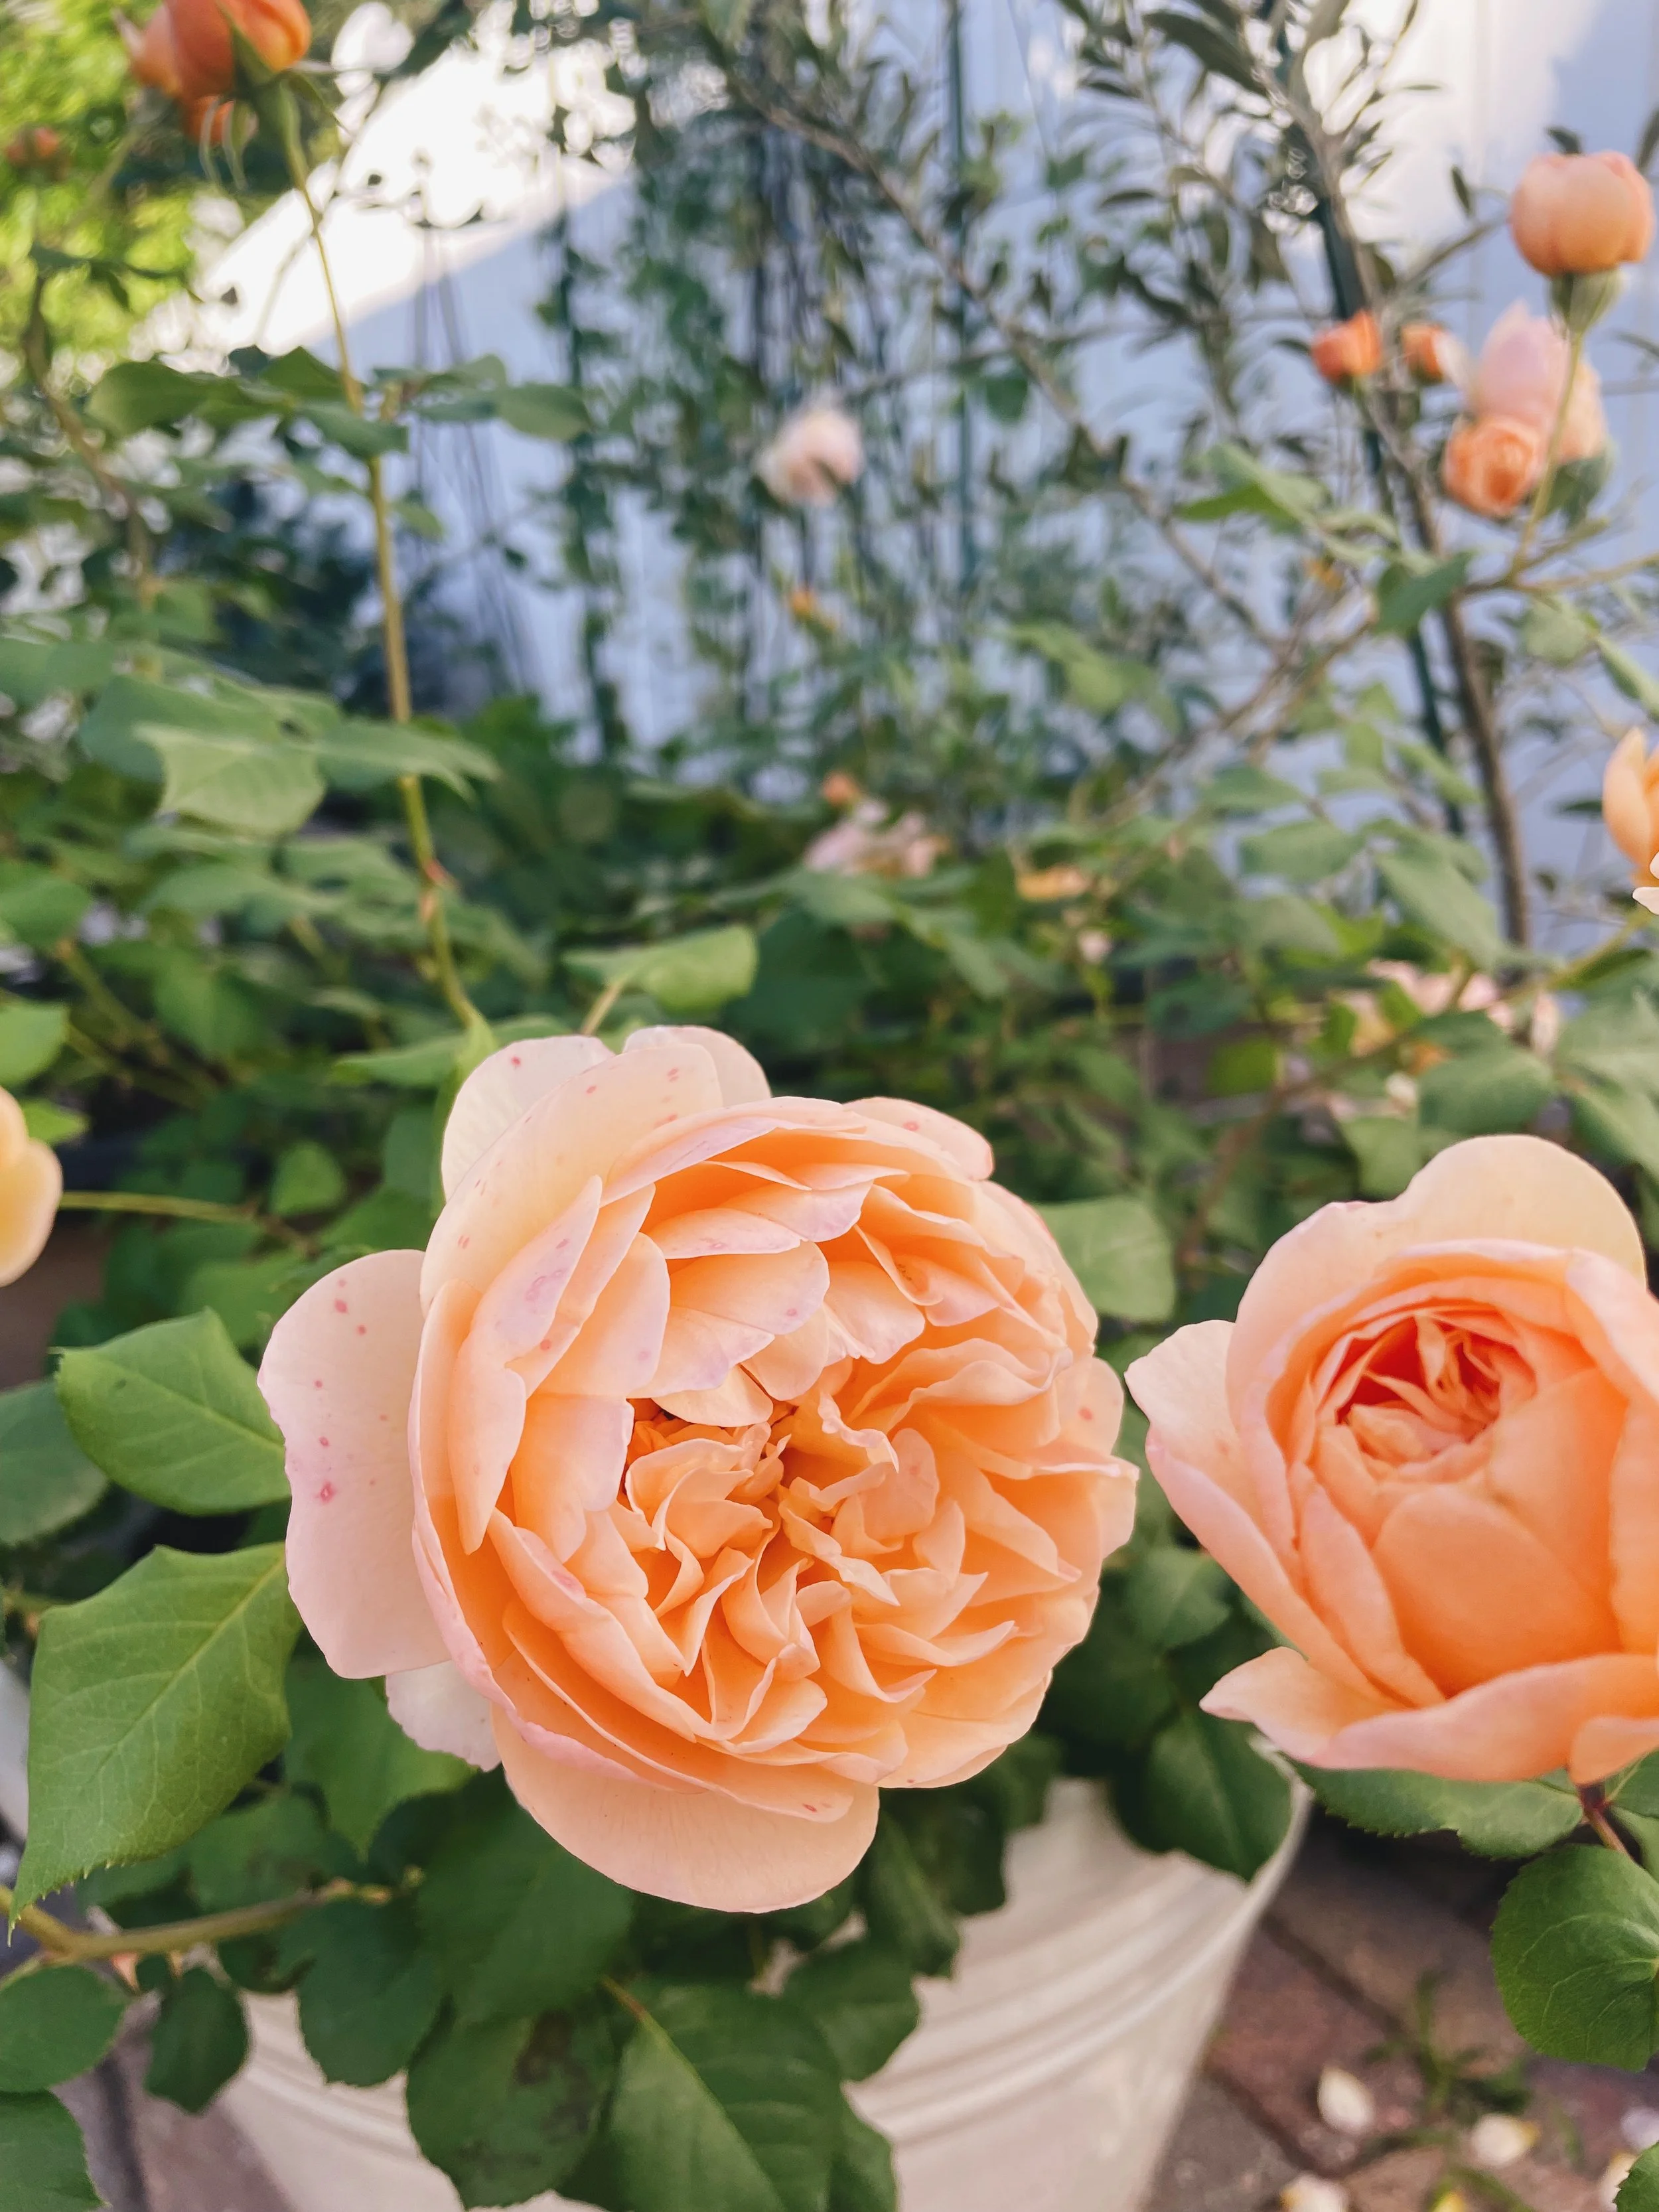
The pot shown in this photo is from my local Lowes, and looks beautiful in the corner of the patio! It sits at the entrance to my Kitchen Garden and is already full of gorgeous Apricot Blooms to welcome you in.
Next up, SOIL!
For potted roses you’ll want to find an organic potting mix and some rich compost! Since we want to make sure there’s good drainage, you’ll need to either drill or pop out holes in the bottom of your planter. I like to line the bottom with a layer of stone or large gravel. If you don’t have that handy, you can also break down used styrofoam. This helps ensure the soil won’t fall out of the holes, and also aid in drainage. Fill your pot with organic potting soil about half way, then add your bare root rose in the center. Make sure the roots can spread out, and the union is positioned just a couple inches below to top edge of the pot.
Now you’ll want to sprinkle some mycorrhizal fungi over the roots, and fill with organic potting soil to just below the union of your bare root.
To finish off filling your pot, add a few inches of rich compost to the top layer - covering the union. This will add a ton of amazing nutrients to help your new rose baby take off. This is my secret weapon! You can easily find mushroom compost, cow manure compost, and lobster compost at most nurseries and hardware stores. Whenever my plants are struggling in my kitchen or rose garden, I add a heavy layer of compost and am always amazed!
Watering
Depending on the type of pot you’re using, your watering schedule may change. Rule of thumb is to keep the soil moist, not soaked. Terracotta, wood, and other porous planters will need more frequent watering. Plastic pots and planters will hold more of that moisture in, so may give you more time between waterings. Either way, consistency is key! In the beginning, I like to keep my roses watered daily. In the Lowcountry heat my soil tends to dry out faster, so I water daily. Once the roses have established I move to anywhere between every other day to twice a week, depending on how hot it is.
Here comes the hard part… Waiting…
Now we just sit back and wait for your shrubs to grow buds and show off their gorgeous blooms! Which can seem like the “not-so-fun” part, but it always amazes me how quickly these bare roots take off once they’re planted! I find myself going out with my coffee every morning to look for new growth. It’s incredible!
What happens after they bloom?
We call this the “First Flush!” And it’s the most exciting! But then the petals start to drop and it’s time for next steps! Fertilizing! After the first flush of roses begin to fall, it’s time to sprinkle on some fertilizer to help feed your shrubs.
My first two years growing roses I was told to try “Rose Tone” but was really disappointed. This year, I reached out to David Austin’s (where I order all of my bare root roses from) incredible customer service team and they recommended I switch to either Scott’s Rose and Bloom or Vigoro Rose Food. I tried the Vigoro option and BOOM my garden was exploding with buds!
The downside is that these 2 options are not organic; however, there are organic options! Vigoro sells an organic rose food online, and my rose group friends also recommended Flower Tone.
That’s it! Whether you have a tiny terrace or large patio space, you can grow roses! Get growing and start enjoying gorgeous shrubs filled with bright colored blooms!
Happy Planting!
This week in the garden…
This week in the garden! Seed starting, garden cleanup, and signs of Spring!
Spring is coming!! Can you smell it?? Last week was a bit of a whirlwind. I was out of town for photoshoots, and couldn't wait to get back to my happy space - my garden! Before I left I was able to start 2 seed trays, and I crossed my fingers they didn’t dry out while I was gone. Lucky me, I came back to tons of healthy, happy sprouts! On Friday I planted 4 more smaller trays filled with mostly cut flowers and herbs. Cut flowers are new to me this year, and I’m so excited (and nervous) to see them grow!
These are my favorite seeds trays! Filled with Organic Seed Starting Mix from Gardeners.com.
Squash sprouts are always the most satisfying! They pop up first, and they’re always the biggest! They needed some quick thinning and will eventually need to be moved into larger pots until the threat of frost has passed and they can be transplanted into their cozy raised garden beds. Peppers and Eggplant are always a little slower, but I woke up this morning to little tiny green leaves emerging from the soil. So exciting!
Outside, the garden needs some serious clean up (I will not show you my mess.. hah!!) but 3 of the raised beds are starting to explode with lettuce, spinach, arugula, and kale seedlings! The snap peas are starting to grab onto the trellis, and the roses are getting leafy! We even had our first rose bloom of the season! It was such a lovely reminder that these beds will be overflowing with harvests and blooms (see what I did there) so soon.
Such a gorgeous yellow/apricot bloom! This was my first climbing rose. I have 2 of them framing the entry to my Kitchen Garden, trailing up an iron arch. This is their second year and they are already halfway up the sides of the arch. I’m hoping by year 3 they’ll be fully covering the arch, and offer a stunning entry into my garden oasis! Goals!
This week I’ll be building some new Cedar Raised Beds for a client, and a couple more for my cut flower garden! We’ll be tidying up the yard, pulling weeds, removing leaves, and composting to get ready for March. Almost halfway through February! The last frost date for Bluffton, SC is March 9th. I am planning on transplanting my seedlings into the raised beds on the 15th of March, so pray for no more frost!!
Have a great week ahead everyone!
Kale that I planted a little over a month ago.
I cut some outer leaves to add to our breakfast hash this weekend! As fresh as it gets!
Spring Garden Planning
It’s time!! Time to start clearing out the old to get ready for the new! Our last day of frost here in Bluffton, SC is March 9! 2 Month countdown!! In preparation for the warm, sunny days ahead, I’ve begun planning my Spring garden layout, ordering seeds, preparing my raised beds, and getting ready to start my indoor seed trays this week.
In order to maximize my harvests and get the most out of my garden space I like to use an intensive gardening plan. By utilizing vertical growing on trellis’ and arches, and mixing each bed with a variety of companion plants I get to use up (almost) every square inch! This will give me plenty of healthy harvests all spring/summer, and also creates a beautiful garden space flowing with vines, towering vegetables, leafy greens, edible flowers and herbs, and lots of root veggies all intermingled. This year I am rotating my crops to keep the soil healthy, and reduce the risk of pests. I’ll also be adding in some new squash varieties, tons of beets, turnips, and radishes, and even trying to mix in some melons! So excited to see my garden come back to life and fill up with a beautiful array of color once again.
Seed Starting
Now the we have the garden plan ready, it’s time to start seeds! Since we have 2 months left of potential frost, I’ll be starting my seeds indoors. This will allow me to get a jump start on the growing season, and come March I’ll have seedlings ready to transplant into their homes for the Spring/Summer. My favorite company to order seeds from is High Mowing Seeds. Their seeds are organic, and I find their germination rate to be outstanding! My plants last year that started from High Mowing Seeds were by far the healthiest, and now they’re my go-to for all veggies, herbs, and flowers! Plus their website is really user friendly and filled with incredible growing tips and tricks!
When starting my seeds, I like to use this galvanized seed tray (pictured above) from Gardeners. The cells pop out for easy removal so I can check their root growth, and I like that I can reuse the tray season after season without any added plastic! Once the seedlings outgrow their little cells, I transplant them to small terracotta pots to allow them a little more time to establish strong roots before it’s time to plant them in the raised beds. This system worked great for me last year!
Now let’s get planting!
It’s time to get our hands back in the soil! Although I did keep a Cool Weather garden this year, filled with lettuce, herbs, pansies, violas, kale, and chard, I am SO ready for a fresh start this spring and to see my garden exploding with color again! Check back next week as we dive deeper into Companion Planting. If you need any assistance in planning your Spring/Summer Kitchen Garden, feel free to reach out! Happy Spring Planning, friends!
Fall Seed Starting Workshop
Lowcountry Fall Seed Starting Workshop
This past week we kicked off our fall gardens with a Seed Starting Workshop (Harvest & Bloom’s first one EVER!!). The class was such a hit, and I am so grateful for my supportive friends! We had a blast going over our southern gardening schedule, the plants that work best for our “warm season” gardens, how to plant in seed trays, and how to plant each different seed. Of course there was a charcuterie and wine to make the night even more fun!
Before becoming a garden coach, I had always been taught that you plant your garden around Mother’s Day (up in the northeast), and as the temps start to drop in the fall, that’s it for the year! Then you wait for Spring to replant. Boy, was I so wrong! Not only can you garden all year (no matter where you are!) but living in our southern area of Bluffton, SC means an even longer “warm” growing season, and more opportunities to grow a wide variety of vegetables and herbs as we wait for cooler temps! Fall in the Lowcountry is actually Spring Round 2! Think it’s too late to grow your tomatoes and cucumbers? Think again! Now is the time to get planting on things you may have missed in the spring, or maybe something that has reached maturity and is ready for a fresh start.
At our workshop last week, we planted everything from Hot Peppers, Beans, Tomatoes, Cucumbers, Butternut Squash, and herbs, to even starting our Broccoli and Cauliflower so it’s ready to move outside in a couple months when the temperature drops a bit. We used an organic soil mixture for a healthy start, and let’s just say, these seedlings are so happy! Within 3 days we had tons of sprouts and the group all shared their photos, so proud of their new plant babies. It was such a fun night, so we’re already planning our next workshop! Fall Herb Planters, here we come!!


